
This is a simple do-it-yourself craft project that anyone can enjoy making for Valentine’s Day! You can also fill them with candy and give them as a gift. These clay flower pot candy jars can be made for any holiday or occasion or even to match the decor in your home. I first tried this project 3 years ago along with some ladies in my neighborhood craft group. We had a ball working on these candy jars together. I am going to share a photo slide show (30 photos) of our crafting event below, then I will share with you supplies needed and step-by-step directions so you can make your own!
SUPPLIES NEEDED:1 clay clay flower pot (size is up to you but 4″ pots work well)
1 glass bowl from Dollar Tree (about 4″ in size, just make sure it fits well on top of the clay flower pot)
1 clay saucer for lid (4″ in diameter, make sure it fits nicely on top of your bowl)
Spray Paint (color is up to you, we used red and black)
Clear Sealant Spray
Wooden ball or knob from craft store for lid (I recommend finding ones that have a flat side because it is easier to glue on than the round ones)
Glue (E6000 glue works best for gluing bowl to pot and knob to lid, you might also want clear Tacky glue for adhering ribbon)
Optional: ribbon, vinyl words, acrylic paint, other embellishments to decorate your jar

DIRECTIONS:
- Take the price tags off your clay pot and glass bowl (you may have to use Goo Gone to get rid of any residual stickiness. Wash your bowl with warm soapy water and clean off your flowerpots to make sure there is no dust.
- Set up an area outside or in a well-ventilated area to paint your flowerpot, saucer, and knob. I used a piece of cardboard in my garage.
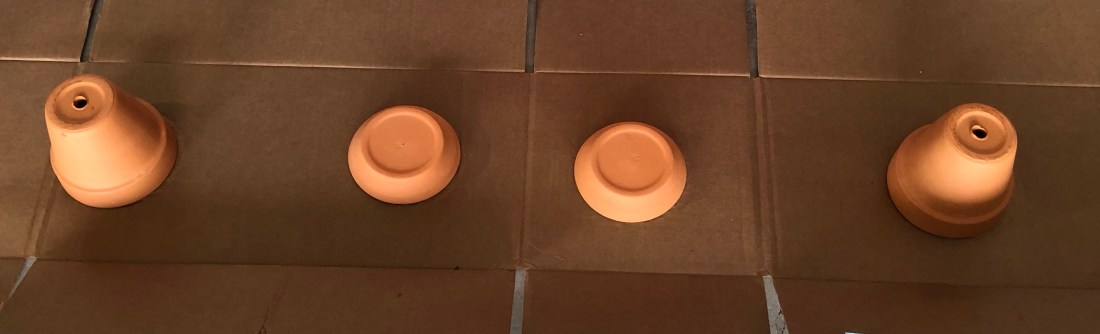
- Read the directions on your paint. Be sure to shake it thoroughly before spraying. Spray evenly and lightly all the way around your pot and on the bottom portion of your saucer. Let it dry completely, then apply a second coat of paint. If you want your knob painted, paint it too (you may paint it the same color or a different color or leave unpainted).
- Once your paint is dry, you will want to seal it with a clear sealant spray. You can buy sealant at Walmart, a craft store, or any Hardware store.

After painting and sealing - Now you are ready to glue! You will want to be in a well-ventilated area or open a window when using E6000 glue. Apply glue to the bottom side of the flower pot, then center the glass bowl on top and hold for about 30 seconds. It’s best to let it dry overnight before use. At this time, also glue your knob to the saucer lid.Time to decorate! Here is where you will use your creativity as well as use the supplies you have on hand or purchase. You can make vinyl words to go on your candy jars using a cutting machine, such as a Cricut or you can purchase vinyl lettering or designs from a Craft Store, such as Michaels. You can buy Valentine ribbon, sequins, glitter, washi tape, or any other supplies you want to decorate your jars. You can even paint designs onto your jar. Make them unique and to fit your personality and decor.


Now, I will share with you how I finished up the recent two jars I made.


I used Tacky glue to adhere some ribbon around the bottom circumference of the candy jar. You could also use vinyl or washi tape easily.


Awesome idea! I’m definitely going to make one. Thanks for sharing.
LikeLiked by 1 person
😊
LikeLiked by 1 person
If you don’t mind, I also shared it on my personal Facebook page.
LikeLiked by 1 person
Awesome! Thanks!
LikeLiked by 1 person
Such a creative idea! I love it! 🙂
LikeLiked by 1 person
The result looks great! I never would’ve thought about using flowerpot and saucers to create something so lovely! And I love it that you can also recycle old pots or knobs!
LikeLiked by 1 person
Thank you! I love using common things to make something new and different.
LikeLike
This is absolutely adorable!! And the materials are easy enough to track down, too. A great craft to make with the kiddos, thanks!
LikeLiked by 1 person
💕
LikeLike
Such a cute idea!! Great for teachers and friends. I would have never thought of that!
LikeLiked by 1 person
Thank you!
LikeLike
I love this idea!
LikeLiked by 1 person
This is so cute. My kids would love this.
LikeLiked by 1 person
Awesome! They could make it any color or them they wanted too.
LikeLike
I love this idea!!!!!
LikeLiked by 1 person
💜 Happy Valentines!
LikeLiked by 1 person