If you are crafty and like to create, you are surely already thinking about making Christmas ornaments for this year’s tree! If you missed my first two blog posts about making your own ornaments, be sure to go back and check out “Glitter Ornaments” and “Floating Ornaments“, both so beautiful, and they make great gifts! For this round of Christmas Ornaments, I will share with you ideas on filling your ornaments with various items to make cute, whimsical, decorations for your tree!


General Supplies Needed:
Glass or Plastic ornaments (ball, disc-shaped, square-shaped, etc.)
Fillers (bells, hay/straw/raffia, fake snow-many varieties, tinsel/garland, sand, small items such as the Christmas tree above, shells, etc. The possibilities are endless!)
Ribbon (to use as an embellishment or to use as your hanger)
Vinyl wording or stickers (You can use your cutting machine to create your design)
Vinyl, Transfer paper, weeding tool (if designing wording)


- Decide on your design and what you will put in your ornament.
- Purchase all the necessary supplies
- Create your design using Cricut Design Space or Silhouette Studio. There are many free designs (svg’s) you can download from sites such as www.lovesvg.com or that you can purchase from such as Etsy. If you do not have a cutting machine, you can purchase vinyl designs from the craft store or you could use stickers.
- Apply the design to your ornament. (for those with a cutting machine, I recommend using 651 vinyl and you can use clear contact paper to transfer).
- Fill your ornament. Carefully fill your ornament… especially if you are using a glass ornament. Do not make your ornament too heavy. When I made an ornament with sand, I ended up having to take out half of it so that I could hang it on the tree. When I was making a floating ornament and put a few bb’s into my glass ornament, it broke! I had to redo it and decided to use plastic instead and that worked great! So keep in mind what you are filling your ornament with before choosing glass or plastic and make sure you can put the top on and hold it without it coming off. For the “O Christmas Tree” ornament above, I placed a glue dot down in the bottom center using a Cricut tool then pushed the tree on top of it, to hold it in place.
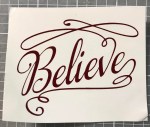
- Embellish! Put the little silver top back on the ornament and then you can either use a regular wire ornament hook or use some pretty ribbon, jute, or cord. You can embellish your ornament with curly ribbon or a big bow. In the “Believe” ornament below, I tied a bell on the outside with my ribbon.


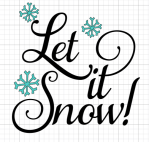
For the snowman face ornament above, I used little styrofoam beads from the dollar store, but you can also use fake snow … instead of a snowman face, you could do “Winter Wonderland” or “Let it Snow”. How about filling an ornament with red pom-pom balls, red garland, or red ribbon and the adding a painted or vinyl belt around the outside to look like Santa? That would be cute! You could do something similar to make a reindeer by filling the ornament with a brown gift bag filler then adding a nose and eyes and antlers on the outside.
One that I plan to make is to fill the ornament with pretty feathers then apply a design on the outside that says “Feathers appear when angels are near”. I guess what I am trying to do is get you to think about what Christmas means to you and what is special to you at Christmas time. Use those thoughts and memories to help you create ornaments for your tree or to give as a gift!
Please give me a like if you enjoyed reading this and follow my blog if you want to see more craft ideas! Come visit me on Pinterest and please share your ornament creations with me. Thanks for visiting! Kristina

So fun! Will be trying out this year!
LikeLiked by 1 person
Awesome! Have fun!
LikeLike
Great and very helpful blog
LikeLiked by 1 person
Thanks!
LikeLike
Oh my goodness! I am definitely making these as Christmas presents for teachers this year. Thank you so much for the easy and creative inspiration!
LikeLiked by 1 person
Teacher gifts are a fabulous idea! Unique and inexpensive!
LikeLike
Those are beautiful! Such a great idea & would be an awesome Christmas present!!
LikeLiked by 1 person
Wow… This DIY Christmas decor are so cute. I am not a crafty type but i will give this one a shot. Thanks for the tips 😊 I jist love the one that has the tiny Christmas tree inside. So cute.
LikeLiked by 1 person
Thank you! You can do it:)
LikeLike
These are really great ideas! What an inexpensive way to decorate the tree or to give as gifts. Here’s my one question: how do you get the beach one from getting messed up while it’s stored between years?
LikeLiked by 1 person
Good question! You have to put it in a container standing up, something specifically to hold ornaments is useful:)
LikeLike
These are so much fun! I actually have a Cricut, so I can print the vinyl words myself. I love the beach one – it would be cool to use things collected from a trip and put the name of the trip on it (like “Cape Cod 2018”).
LikeLiked by 1 person
Vacation idea is great!!
LikeLike
Hello! I saw your pic of the ornament with the Cardinals and the angels! I lost my memaw last Christmas and shortly after my papaw. My nana told me this saying and has feeders out and keeps a yard of Cardinals. I was hoping you could tell me where you found the design so I can make my nana an ornament like it for Christmas. I would sure appreciate it!
LikeLiked by 1 person
Sure, I will look when I get home later and send to you:)
LikeLike
https://www.etsy.com/transaction/1220781014
LikeLike
These are adorable! I’m inspired and ready to go make some right!
LikeLiked by 1 person
That’s great! Would love to see pics of what you make!
LikeLike